STEP 1: Download this TOOL_NEEDED_IN_EP7_CONVERTION.7z this is the file'S that you will be needing in the upgrading process
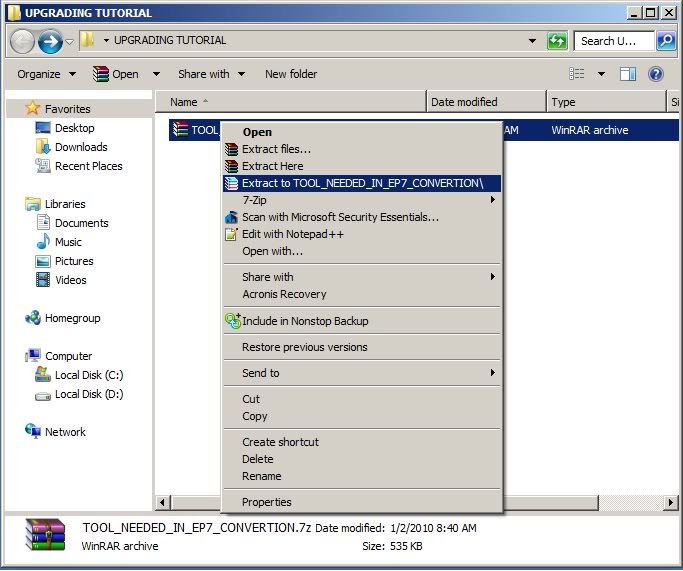
STEP 2: Extract the file TOOL_NEEDED_IN_EP7_CONVERTION.7z to any any new folder that you like.. ME i use folder name "UPGRADING TUTORIAL" just an example i put all the file that will be needing in the upgrading process
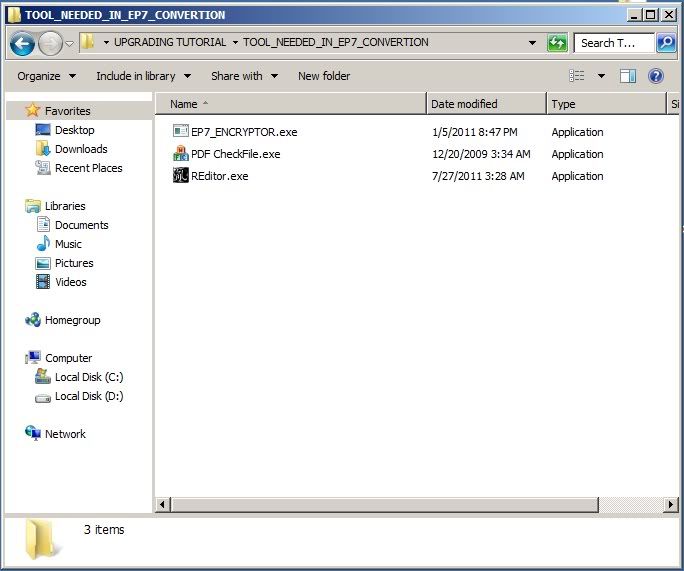
it look's like this
FIG.2.0BEFORE
 it look's like this
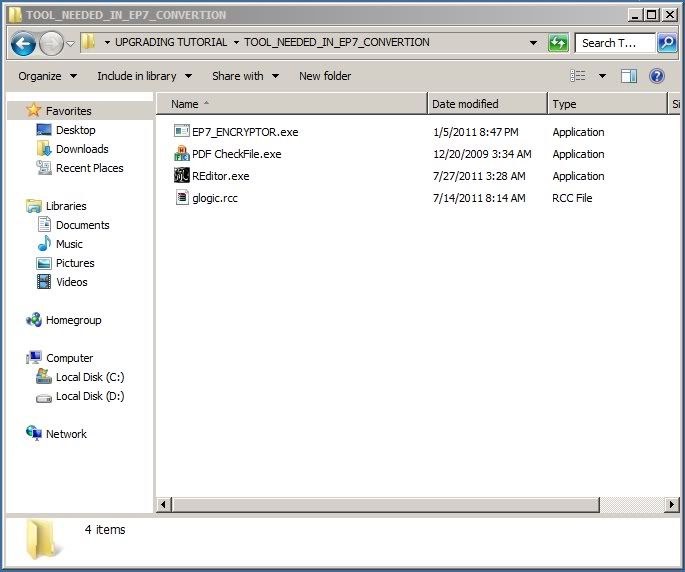
FIG.2.1 AFTER
it look's like this
FIG.2.2 THE INSIDE THE "TOOL_NEEDED_IN_EP7_CONVERTION.7z"
STEP 3: Put your ep6 glogic.rcc inside the TOOL_NEEDED_IN_EP7_CONVERTION folder
it look's like this
FIG.3.0
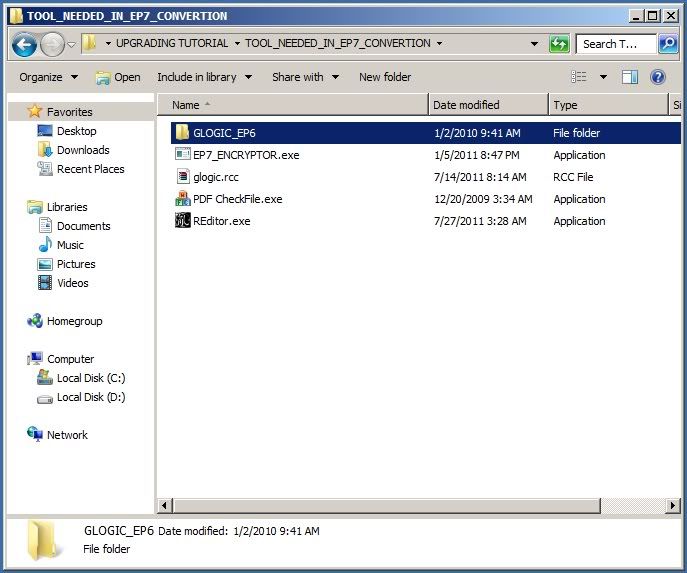
STEP 4: Create a new folder name it w/
GLOGIC_EP6 inside the TOOL_NEEDED_IN_EP7_CONVERTION folder
it look's like this
FIG.4.0
STEP 5: now let's open the glogic.rcc w/ wirar
it look's like this
FIG.5.0
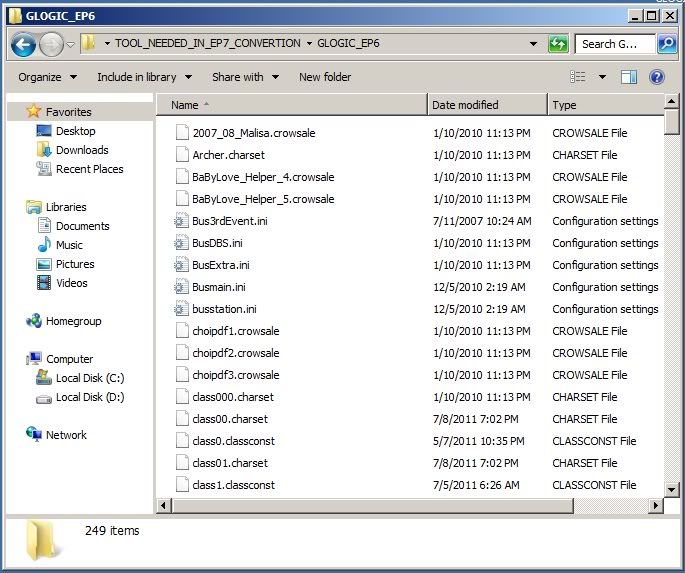
STEP 6: now Select ALL the item's inside the glogic.rcc that you open w/ wirar in
step 5 and extract it to the folder that you created in
step 4
it look's like this
FIG.6.0
STEP 7: Now let's check the file that you extracted using the method in
step 6 if all the files are there delete this FF. file's
item.isf
crow.mnsf
Comment.ini
skill.ssf
tip.txt
it look's like this
FIG.7.0
STEP 8: Create a new Folder and name it w/ GLOGIC_EP7 inside the
TOOL_NEEDED_IN_EP7_CONVERTION FOLDER
it look's like this
FIG.8.0
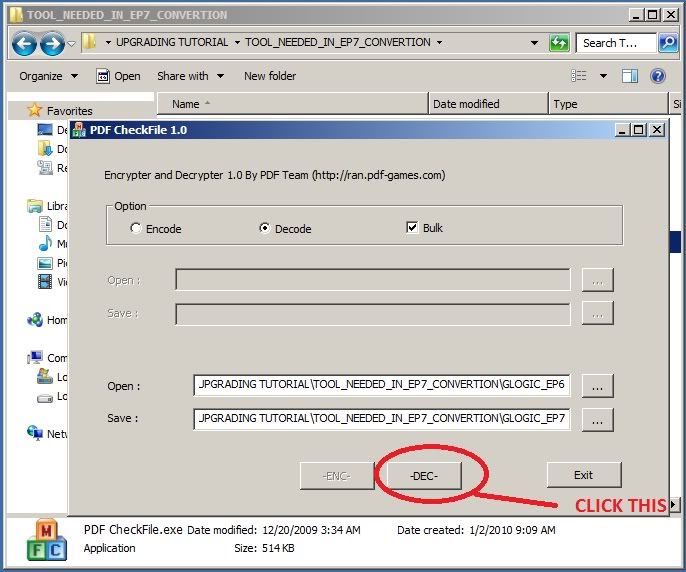
STEP 9: Let's Run/open PDF CheckFile.exe inside the
TOOL_NEEDED_IN_EP7_CONVERTION FOLDER
it look's like this
FIG.9.0
STEP 10: i assume that you already know how to use the file that have been run/open in
step 9 so i won't be explaining the whole thing how to use it.. Just see the image in the spoiler of
figure 10 it will explain everything
it look's like this
FIG.10.0
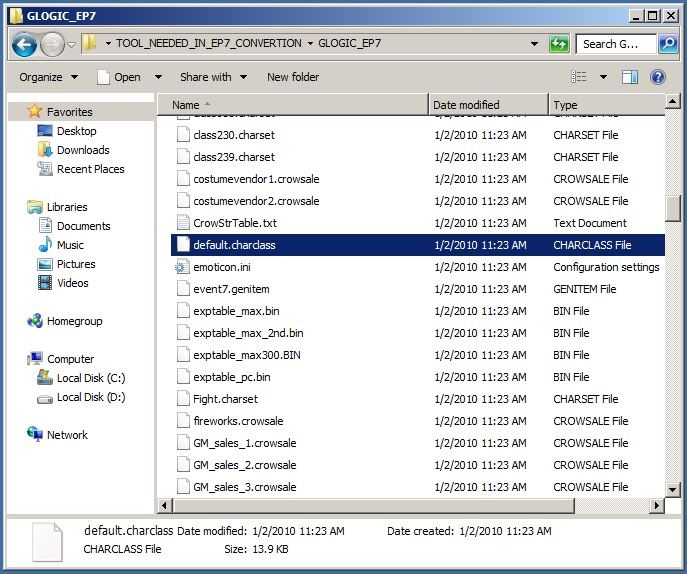
STEP 11: Now all the
encrypted file in
GLOGIC_EP6 FOLDER is now
decrypted in
GLOGIC_EP7 FOLDER
it look's like this
FIG.11.0
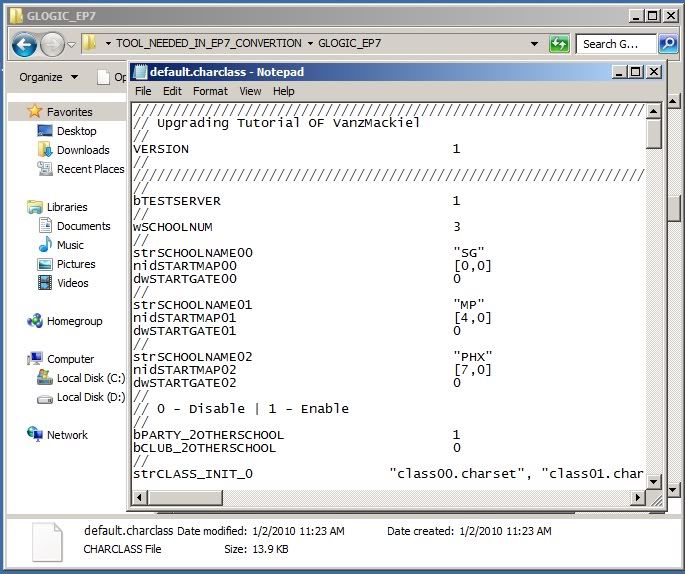
STEP 12: Now let's open the
decrypted default.charclass in any texteditor that you have. the
decrypted default.charclass is located inside the
GLOGIC_EP7FOLDER
it look's like this
FIG.12.0
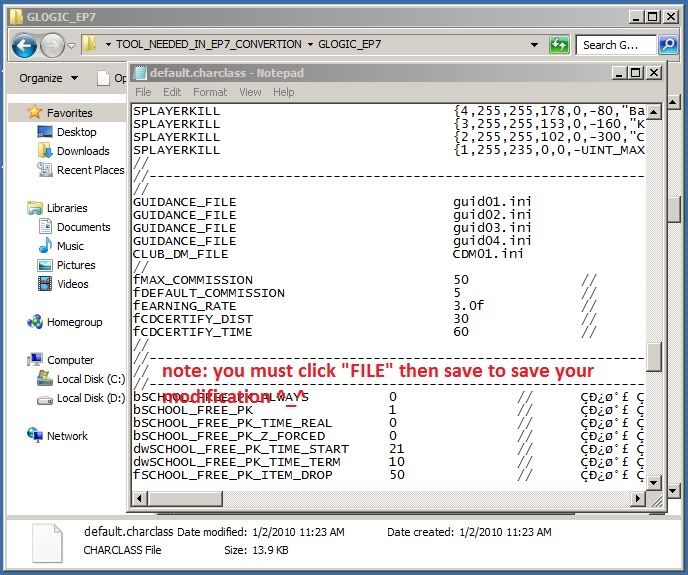
STEP 13: Now let's Find This as you can see the difference between the two the red mark is the missing line or word in your ep6
default.charclass
Code:
//--------------------------------------------------------------------[EPISODE 6]
//
GUIDANCE_FILE    guid01.ini
GUIDANCE_FILE    guid02.ini
GUIDANCE_FILE    guid03.ini
GUIDANCE_FILE    guid04.ini
//
Code:
//--------------------------------------------------------------------[EPISODE 7]
//
GUIDANCE_FILE    guid01.ini
GUIDANCE_FILE    guid02.ini
GUIDANCE_FILE    guid03.ini
GUIDANCE_FILE    guid04.ini
CLUB_DM_FILE    CDM01.ini
//
: Now let's open the
decrypted mapslist.ini in any texteditor that you have. the
decrypted mapslist.ini is located inside the
GLOGIC_EP7 FOLDER
it look's like this
FIG.14.0
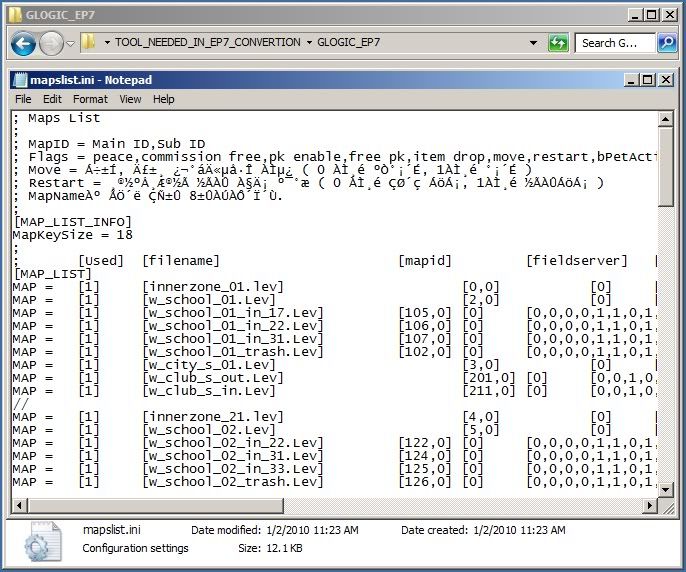
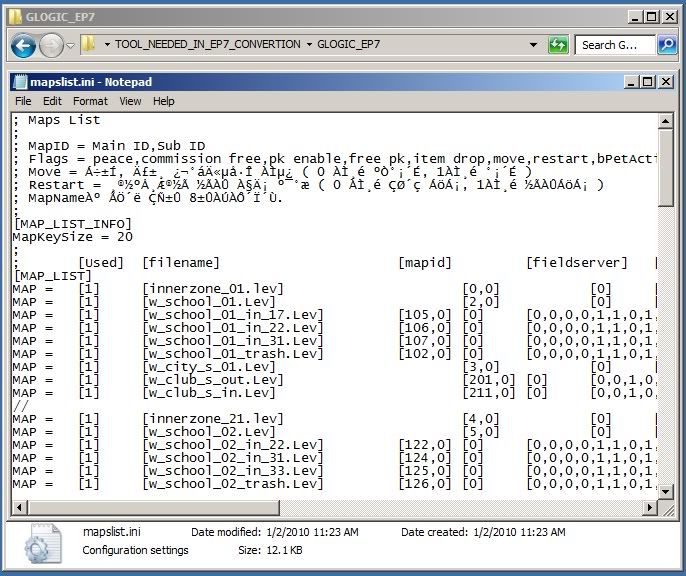
STEP 15: Now let's Find This as you can see the difference between the two the red mark is the missing line or word in your ep6
maplist.ini
and there is 3 difference between ep6 and ep7 maplist.ini i already put a red mark on it jus compaire the 2
Code:
//--------------------------------------------------------------------[EPISODE 6]
//
; Maps List
;
; MapID = Main ID,Sub ID
; Flags = peace,commission free,pk enable,free pk,item drop,move,restart,bPetActivity
; Move = Á÷±Í, Ä£±¸ ¿¬°áÄ«µå·Î À̵¿ ( 0 ÀÌ¸é ºÒ°¡´É, 1ÀÌ¸é °¡´É )
; Restart = ¸®½ºÅ¸Æ®½Ã ½ÃÀÛ À§Ä¡ º¯°æ ( 0 À̸é ÇØ´ç ÁöÁ¡, 1ÀÌ¸é ½ÃÀÛÁöÁ¡ )
; MapNameÀº ÃÖ´ë ÇÑ±Û 8±ÛÀÚÀÔ´Ï´Ù.
;
[MAP_LIST_INFO]
MapKeySize = 18
;
;  [Used] [filename]   [mapid]  [fieldserver] [flags]   [mapname]  [bgm]   [loaging image]
[MAP_LIST]
MAP =  [1] [innerzone_01.lev]   [0,0]  [0] [1,0,0,0,1,1,0,0,0,1]  [SG_Campus1F]  [campus.ogg]  [sg_campus.tga]
//
Code:
//--------------------------------------------------------------------[EPISODE 7]
//
; Maps List
;
; MapID = Main ID,Sub ID
; Flags = peace,commission free,pk enable,free pk,item drop,move,restart,bPetActivity
; Move = Á÷±Í, Ä£±¸ ¿¬°áÄ«µå·Î À̵¿ ( 0 ÀÌ¸é ºÒ°¡´É, 1ÀÌ¸é °¡´É )
; Restart = ¸®½ºÅ¸Æ®½Ã ½ÃÀÛ À§Ä¡ º¯°æ ( 0 À̸é ÇØ´ç ÁöÁ¡, 1ÀÌ¸é ½ÃÀÛÁöÁ¡ )
; MapNameÀº ÃÖ´ë ÇÑ±Û 8±ÛÀÚÀÔ´Ï´Ù.
;
[MAP_LIST_INFO]
MapKeySize = 20
;
;  [Used] [filename]   [mapid]  [fieldserver] [flags]   [mapname]  [bgm]   [loaging image]
[MAP_LIST]
MAP =  [1] [innerzone_01.lev]   [0,0]  [0] [1,0,0,0,1,1,0,0,0,1,1]  [SG_Campus1F]  [campus.ogg]  [sg_campus.tga][0]
//
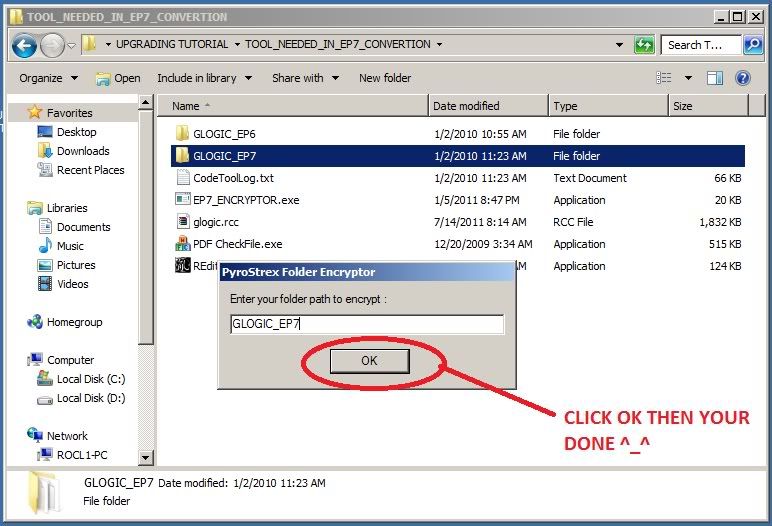
: Now we are done w/ the updating process... Let's go to the easiest part encrypting the decrypted files open the
EP7_ENCRYPTOR.exe located inside the "
TOOL_NEEDED_IN_EP7_CONVERTION" FOLDER
it look's like this
FIG.16.0
STEP 17:THE LAST PART IS DOWNLOAD THIS FILES FOR CLIENT UPGRADE.7z and use your COMMON SENSE or if can't really understand the last part